Phlebotomy is a critical skill in medical practice, involving the collection of blood for testing, transfusions, donations, or research. Knowing what are the 3 main veins to draw blood is fundamental for any phlebotomist. These veins include the median cubital, cephalic, and basilic veins. This guide will delve into the specifics of these veins, the materials needed for venipuncture, safety protocols, and the step-by-step procedure to ensure efficient and safe blood collection.
| Key Takeaways: 3 Main Veins to Draw Blood |
| Understanding the Main Veins: The median cubital, cephalic, and basilic veins are the primary sites for blood draws. |
| Safety First: Always follow safety protocols, including the use of PPE, proper disposal of needles, and hand hygiene. |
| Proper Order of Draw: Adhering to the correct order of draw prevents cross-contamination and ensures accurate test results |
| Patient Comfort: Reassure patients and verify their information to ensure a smooth procedure. |
| Troubleshooting: Be prepared to adjust techniques and seek assistance if necessary. |
What Are the 3 Main Veins to Draw Blood?
The Median Cubital Vein
The median cubital vein is the most commonly used vein for venipuncture. Located in the antecubital fossa, the area of the arm in front of the elbow, it is typically the easiest vein to locate and puncture. This vein is preferred because it is usually well-anchored and less likely to move during needle insertion, reducing the risk of complications.
The Cephalic Vein
The cephalic vein is located on the lateral side of the arm, running along the thumb side. While not as commonly used as the median cubital vein, it is a good alternative when the median cubital vein is not accessible. However, the cephalic vein tends to be more challenging to locate, particularly in patients with excess adipose tissue.
The Basilic Vein
The basilic vein is found on the medial side of the arm, closer to the body. It is generally the least preferred of the three veins due to its proximity to the brachial artery and median nerve, which increases the risk of complications. Despite this, it is sometimes used when other veins are not suitable.
Materials Needed for Routine Venipuncture
- Safety Needles: 22 gauge or less.
- Butterfly Needles: 21 gauge or less.
- Syringes
- Vacutainer Tube Holder
- Transfer Device
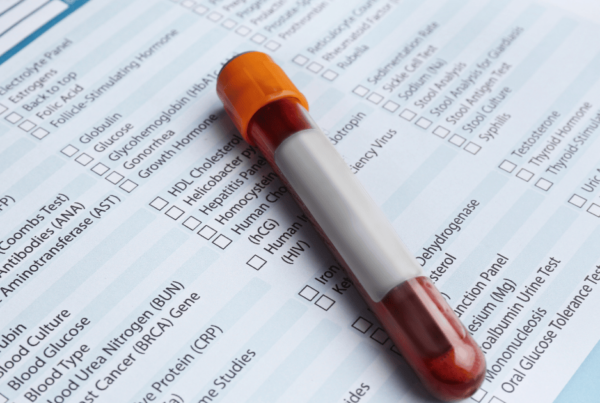
- Blood Collection Tubes: Designed to draw a predetermined volume of blood. Different additives in tubes (identified by cap color) are used for specific tests.
- Tourniquets: Single-use, disposable, latex-free.
- Antiseptic: Individually packaged 70% isopropyl alcohol wipes.
- 2×2 Gauze
- Sharps Disposal Container: Puncture-proof, marked “Biohazardous”.
- Bandages or Tape
Safety Precautions
Adhering to safety precautions is essential in phlebotomy to protect both the patient and the healthcare provider. Below are the key safety measures:
- Universal Safety Precautions: Always adhere to standard safety measures, such as hand hygiene and the use of personal protective equipment (PPE).
- Isolation Procedures: Follow all relevant isolation protocols when dealing with infectious patients.
- Personal Protective Equipment (PPE): Wear PPE at all times, including gloves, lab coats, or gowns.
- Hand Hygiene: Wash hands with warm, running water and appropriate hand-washing products. Use commercial foaming hand wash if hands are not visibly contaminated.
- Gloves: Wear gloves during all procedures and change them between patients.
- Lab Coat or Gown: Must be worn during blood collection.
- Needles and Hubs: Single-use only, disposed of in a sharps container.
- Needle Handling: Never recap, remove, break, or bend needles after use.
- Biohazardous Waste Disposal: Dispose of all items according to biohazardous waste policies.
- Surface Cleaning: Clean contaminated surfaces with a 10% bleach solution daily.
- Needlestick Protocol: Immediately wash the area with antibacterial soap, express blood, and contact a supervisor.
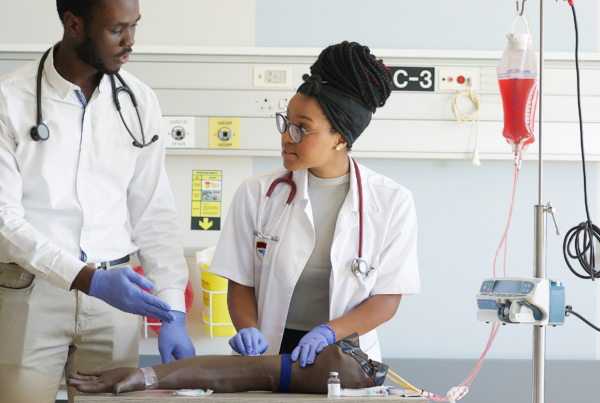
The Venipuncture Procedure
Identifying the Patient
Proper patient identification is the first and most crucial step in the venipuncture process. Misidentification can lead to incorrect diagnosis, treatment, or testing results.
- Verification: Use two forms of active identification (name and date of birth) to match the patient with the requisition.
Reassuring the Patient
Patient comfort and reassurance are important to alleviate anxiety and ensure cooperation during the procedure.
- Communication: Inform the patient that the minimum amount of blood needed will be drawn.
- Diet or Time Restrictions: Verify any necessary restrictions have been met.
Order of Draw
The order of draw is critical to prevent cross-contamination between different types of blood collection tubes, which can affect test results.
- Blood Culture
- Light Blue Top (Plasma): 3.2% sodium citrate for coagulation tests.
- Red Top (Serum): Plain and gel for chemistry and reference tests.
- Green Top (Plasma): Lithium heparin for chemistry tests.
- Lavender or Pink Top (Plasma): Contains EDTA for hematology and blood bank testing.
- Gray Top (Plasma): Sodium fluoride/potassium oxalate for glucose testing.
- Yellow Top (Plasma and Cells): ACD solution for genetics testing.
Equipment Preparation
Gathering and preparing the necessary equipment ensures the procedure is conducted smoothly and efficiently.
- Assembly: Gather all necessary equipment based on the patient’s characteristics.
- Hand Hygiene and Gloves: Wash hands and put on gloves.
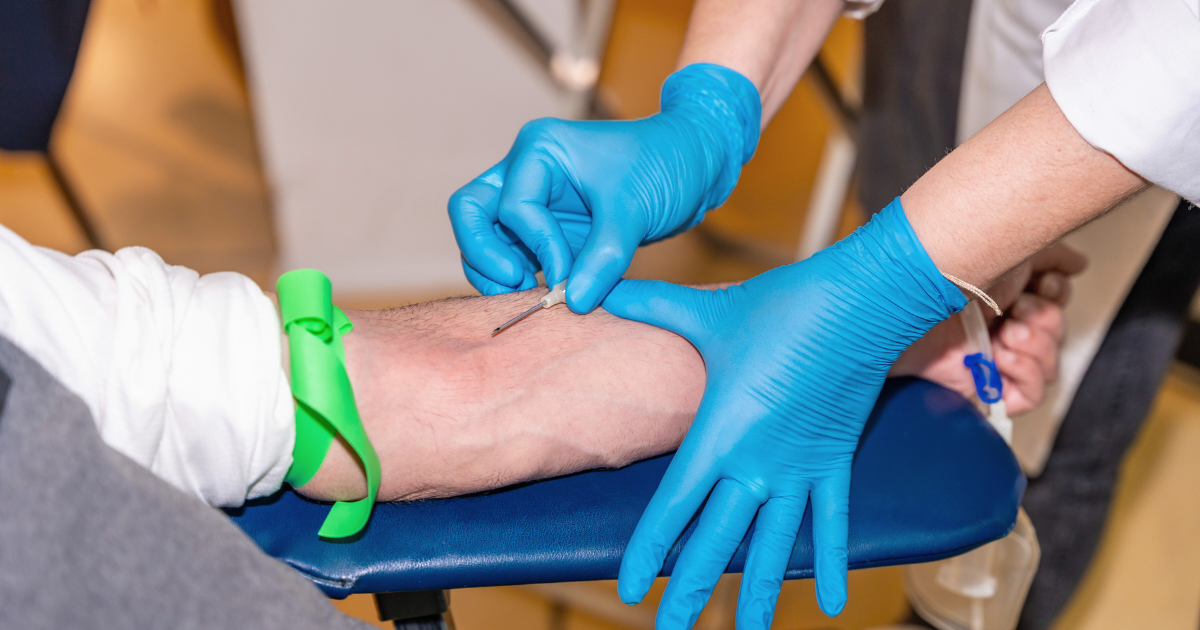
Positioning and Venipuncture
Proper positioning of the patient and accurate venipuncture technique are essential for successful blood collection.
- Position the Patient: Extend the arm in a straight line from shoulder to wrist.
- Vein Selection: Choose the median cubital, cephalic, or basilic veins. Avoid arteries and specific sites (e.g., feet, areas with extensive scarring).
- Tourniquet Application: Apply 3-4 inches above the site, ensuring it is not left on for more than one minute.
- Site Cleaning: Clean the puncture site with 70% alcohol in an outward spiral and let it dry.
Perform Venipuncture
- Attach needle to hub.
- Remove the needle cap, hold bevel up.
- Tighten skin below the puncture site.
- Insert the needle quickly, using a little thrust.
- Insert vacutainer tube into the hub.
- Release the tourniquet once blood flows.
- Remove the tube after blood flow stops and invert gently.
Post-Venipuncture
After drawing the blood, ensuring proper care of the puncture site and handling the collected sample is vital.
- Gauze Application: Place gauze over the puncture site and remove the needle.
- Safety Device Activation: Dispose of the needle in a sharps container.
- Pressure Application: Apply pressure with gauze, then bandage the site.
- Tube Labeling: Label tubes with patient information before leaving the patient.
Special Considerations for Syringe and Infant/Child Phlebotomy
Syringe Venipuncture
Using a syringe for venipuncture can be necessary in certain situations, such as when drawing blood from a fragile vein.
- Needle and Syringe Assembly: Use a sheathed needle or butterfly.
- Insertion and Blood Draw: Follow the same vein selection and insertion technique.
- Blood Transfer: Use a Blood Transfer Device immediately after draw.
- Disposal: Dispose of syringe and needle in a sharps container.
Infant/Child Phlebotomy
Phlebotomy in infants and children requires additional care and technique adjustments to account for their smaller veins and increased anxiety levels.
- Identification and Stabilization: Confirm patient ID and use Papoose apparatus if needed.
- Equipment and Procedure: Follow the same procedures as adult venipuncture, adjusting for age and size.
Troubleshooting Tips
Occasionally, difficulties arise during venipuncture. Here are some troubleshooting suggestions to deal with typical issues:
- Needle Repositioning: Adjust if blood sample is not attainable.
- Ensure Tube Placement: Verify the tube is correctly attached.
- Tourniquet Adjustment: Loosen if necessary.
- Avoid Probing: Attempt a new puncture site if needed.
- Supervisor Involvement: After two unsuccessful attempts, call a supervisor.
Common Issues and Solutions
- Vein Collapsing: This can occur if the vacuum pressure is too high or the vein is fragile. To mitigate this, use a smaller gauge needle or a syringe, and avoid drawing blood too quickly.
- Hematoma Formation: A hematoma may form if the needle punctures through the vein or if pressure is not adequately applied post-puncture. Ensure proper needle insertion technique and apply sufficient pressure after removing the needle.
- Difficulty Finding Veins: In cases where veins are not easily visible or palpable, use a warm compress to increase blood flow or a vein finder device to aid in locating a suitable vein.
Frequently Asked Questions (FAQs): 3 Main Veins to Draw Blood
What are the three main veins used for blood draws?
The three main veins used for blood draws are the median cubital, cephalic, and basilic veins. These veins are preferred due to their accessibility and size.
Why is the order of draw important?
The order of draw is crucial to prevent cross-contamination of additives between different types of blood collection tubes, which could lead to inaccurate test results.
What should be done if the blood sample is not obtainable?
If the blood sample is not obtainable, reposition the needle, check the tube placement, adjust the tourniquet, or use a new tube. If unsuccessful after two attempts, seek assistance from a supervisor.
How should contaminated surfaces be cleaned?
Contaminated surfaces should be cleaned with a freshly prepared 10% bleach solution. All surfaces should be cleaned daily to maintain a sterile environment.
What steps should be taken in case of an accidental needlestick?
Immediately wash the area with antibacterial soap, express blood from the wound, and contact a supervisor for further instructions.
By understanding what are the 3 main veins to draw blood and adhering to these guidelines, phlebotomists can ensure safe, efficient, and accurate blood collection procedures. Phlebotomy Now School is dedicated to providing comprehensive training and maintaining high standards in phlebotomy practices.
Ready to embark on your journey towards mastering the art of phlebotomy? Enroll now at Phlebotomy Now School and unlock a world of opportunities in healthcare. Take the first step towards a rewarding career by joining our comprehensive training program today!